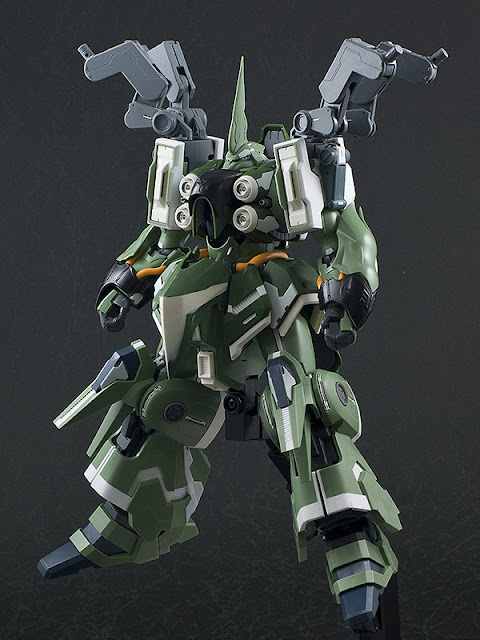
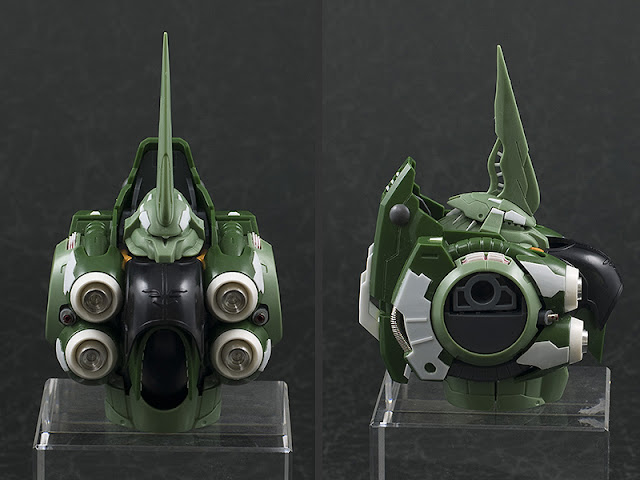
First time experiencing & detailing works on a 1/144scale kit, no SB but just adding plaplate , dig some holes here for some detailing effect :p
Exhaust grill detailing with 0.3mm plaplate
Cut hole for the exhaust grill.
To make the shoulder bracket bulkier , 1mm plaplate add-on 4side and then chamfered.
Rear skirt detailing
Groin armor cut & bend downward.
Side Skirt plaplate-ing
Front skirt with 4mm extended .
Thigh made wider 2.5mm
So the knee joint too, with 1mm plaplate at both side.
Knee Guard crop into half for the side extension.
Lower leg extended 5mm height
To dig a hole
For more exhaust grill details ;)
Lower leg armors detailed with G-temple accessories & extended 4mm height too.
The Lower leg rear armor.
Detail mod on the head - shorten the nose 1mm, raise the head top cap 1mm & some plaplate add-on.
So the over view
Left the feet untouched , and more panel line scribing to be done .... ;P
Thanks for viewing !


nice!
ReplyDelete*speechless*
ReplyDeleteThat is one mad pla-plate skillz u got there.. as expected from master scratch builds XD.. awesome work!
Ive added your blog to my bloglist ^^..
This is really State-of-the-art-of-the-world.
ReplyDeleteMr.Anonymous, tks for dropping by :)
ReplyDeleteTsukinari , tks bro & appreciate adding this to ur bloglist ;p
Vza004, thank you for your kind comment :)
dude.... your insane....
ReplyDeletelike the others im speachless man. To think this is on a 1/144 ... (a big 1/144) but still...
*bows as always*
... when will u make me somthing hahahahah <3
Love it, looks amazing.
ReplyDeleteevery time take a look on your work and it motivates me!!
ReplyDeletei hope i can see the real thing!!!!
THATS COOL... YOUR DONE A GOOD JOB!!FANTASTIC SKILLS
ReplyDeleteNice!!!!! I love everything on it!
ReplyDeleteAwesome indeed, btw I want to ask you some question if you don't mind..
ReplyDeleteI really want to know how to cut a thick plaplates, 1 mm is hard enough for me, but it seems you can cut it proper and fantastic :D
Is there any specific tools that I needed?
Thanks guys :D
ReplyDeleteMaftyNavue , sorry to say there is no special tools but just few slices & snap with 30degree blade on Olfa cutter and frequent break-off just to ensure it's still sharp.
For 2mm plapate, i have a Proxxon mini table saw but only good for long straight cut.
Hope this help :P
how do you get the panel lines to be symetrical at both sides,ie on the back skirt? do you use a paper pattern first?
ReplyDeleteany help appreciated, your stuff is the driving force behind my own humble efforts, and you,ve managed to inspire me half way across the globe...
cheers
rich
Hi Rich, tks for dropping by :)
ReplyDeleteI use Dymo tape for panel line scribe.
when i have done the panel line scribing on right side with the Dymo tape cut out pattern, i just paste the pcs of cut out pattern on the back of the new Dymo and trim it. Then u got a mirror pattern cut out :)
Hope this help
Tks
Hi Juliuslim, I've been looking your work, and seriously, it's astonishing.
ReplyDeleteJust by watching I learn some thing, but I still have question.
What did you used to scult the groin? It don't seem like putty, epoxy maybe?
Keep doing work like that, it motivate me, and amaze me everytime!
Very nice, its rare that I see modifications that make the already amazing kshatriya look even better, very well done. Have you made any progress since this update, im really interested to see what else you have done here?
ReplyDelete