


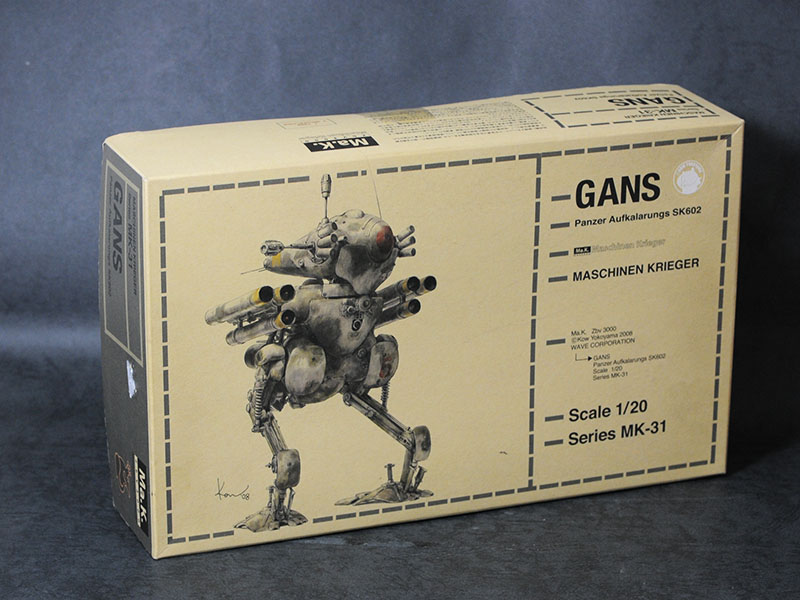
Recently poisoned by Ma.K virus from forum members, and so get myself a very 1st Ma.K kit and found out it was a really rare & discontinued kit :P
*The progress was 10days outdated and it's almost done by now .
No plan for any SB parts , just add on some tiny detail, mostly from Tamiya 1/35 US M1A2 Tank Abrams left over...
...Even the box art also poisonous....retro.. simple.... nice....
Snapfit, quick sanding & remove seamline really a pain here.. compare to a recent MG gundam kit.


the most outrageous topnotch mod in this kit !!!!!
replace the spring look alike plastic to a real metal spring .. 
Also sand off the mold-on nut bolt which is out of shape caused by tooling release direction & replace with kotobukiya's.
Stretch mark on the "napkin" armor plate due to some slight bending for better profile.

Trying to have few areas with forged metal texture by putty+thinner with handbrush & toothbrush "poking" ..


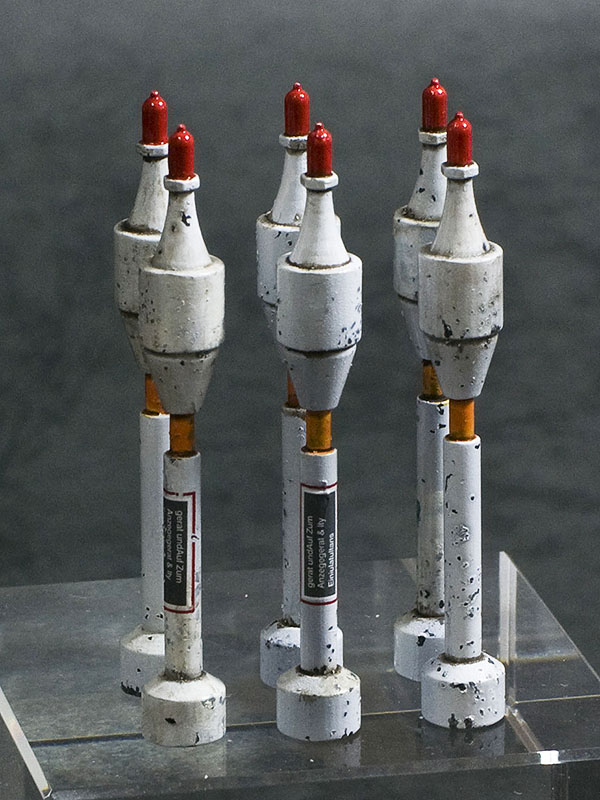
Try to learn weathering technique like salt wash for paint clipping on this project.
Base color 1 - red + black

base color 2 - dark brown

Hair spray+ salt on the drumstick to make it even tasty...

Airbrush the primary color and wash away the salt under running water & brush.

All parts apply the same salt technique

Decide to have a simple camouflage pattern on the head .
With Mr.hobby masking sol and salt again

AB Grey


Primary color done , decal on & ready for enamel wash & weathering


Washed , weathered & flatten with matte coat


i always think that weathering kit reserve a diorama to make thing seem right..
so i m planing to have a action dio for this chicken.
With Sellys All Fix , to create the firing effect.

FIRE !!!


Further touch up & weathering effect applied.
Accumulated dust, dried mud effect with soft pastel (economical pigment powder .. haha)
Just scrub off with knife


Thanks for viewing :)


salt? @.@
ReplyDeletewont melt when contact with the paint?
yummy salt technique
ReplyDeletethanks for sharing!
hi mr. lim~
ReplyDeletecould you tell us why you always use dark red as your base color?
thanks
Hi Wang ,
ReplyDeleteThat's for rust effect by paint chipping :)
awesome :)
ReplyDelete